
When you have successfully completed this section, you will have mastered:
Batteries, and the cables that connect them, operate in extremely hostile environments. By taking a moment to understand a little bit about the most common causes of failure, how to identify and repair them, as well as how to prevent them, you’ll be able to make your life easier by reducing truck downtime.
Under the hood batteries are subject to extreme heat levels and many types of chemicals, fuel and lubricants. In outside locations they’re exposed to the extremes of heat and cold, and water from road splash, rain and pressure washers. Constant heavy pounding from the road sets up vibration that can loosen connections and promote damage from abrasion.
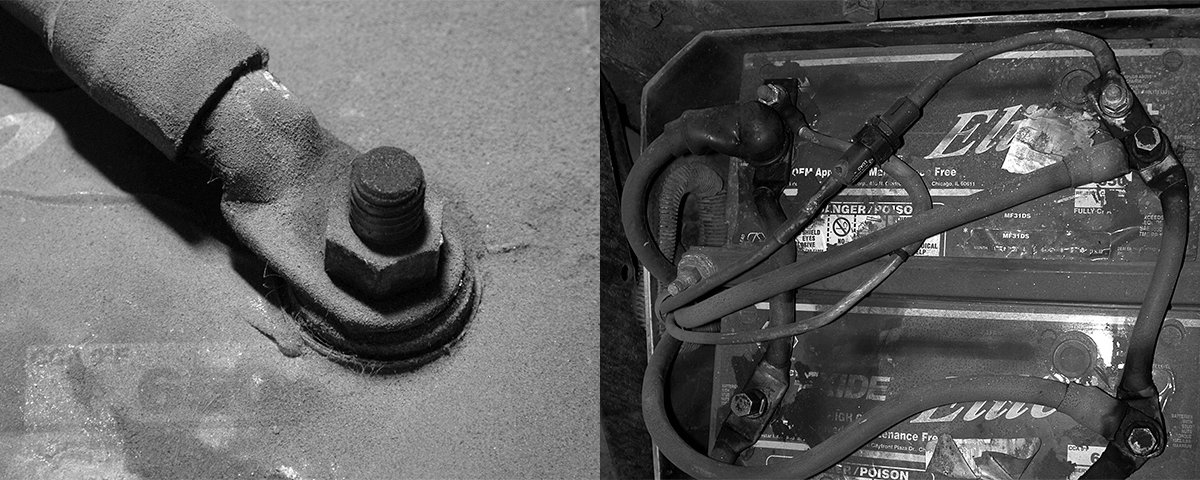
Battery cables are subject to acid vapors, which cause corrosion. It can occur wherever there are exposed metal parts. Even the use of “sealed” batteries doesn’t stop corrosion since sealed batteries “breathe” through small vent openings. Corrosion can be delayed, but occurs sooner or later even where protective dielectric coating is used. As long as batteries use acid, corrosion is likely to be present.
Batteries, and battery cables, operate in extremely hostile environments.
Meet The Enemy – Corrosion
Corrosion generally indicates a poor connection. When corrosion builds up, the connection deteriorates, which in turn causes more corrosion until the connection fails altogether. In the process, the poor connection causes greater resistance and less electrical energy gets through.
Over time, corrosion will eat away at the connections and destroy them.
Defeating corrosion damage begins with using cables, connectors and accessories that are designed to minimize corrosion. Always use heavy-duty clamps, cables and ground lugs, where required. Lightweight clamps and components may not have the necessary load carrying capacity and will cause greater resistance, heat buildup, low current and premature failure.
Preventing failures and poor performance can be as simple as protecting the connections and cables from damage. Shield them from moisture, battery acid and other contaminants by using shrink tubing applied to the joint where the cable is attached to the terminal.
Regular Inspection
One of the most important aspects of good battery cable maintenance is regular inspection. Visually inspect the terminals where they connect to the battery. Corrosion is present when there is a buildup of a white powdery residue. Chances are that the visible buildup around the connectors is only a portion of the corrosion present. It’s likely that there’s additional residue under any protective covers and on the inside of the cable covering. Temporary, emergency repair terminals and inexpensive cables are especially vulnerable to corrosion. Some of this vulnerability comes from the lack of heavy lead and the lack of proper plating. It’s also due in part to the tendency of inexpensive lead terminals to loosen up after being tightened on a battery post.
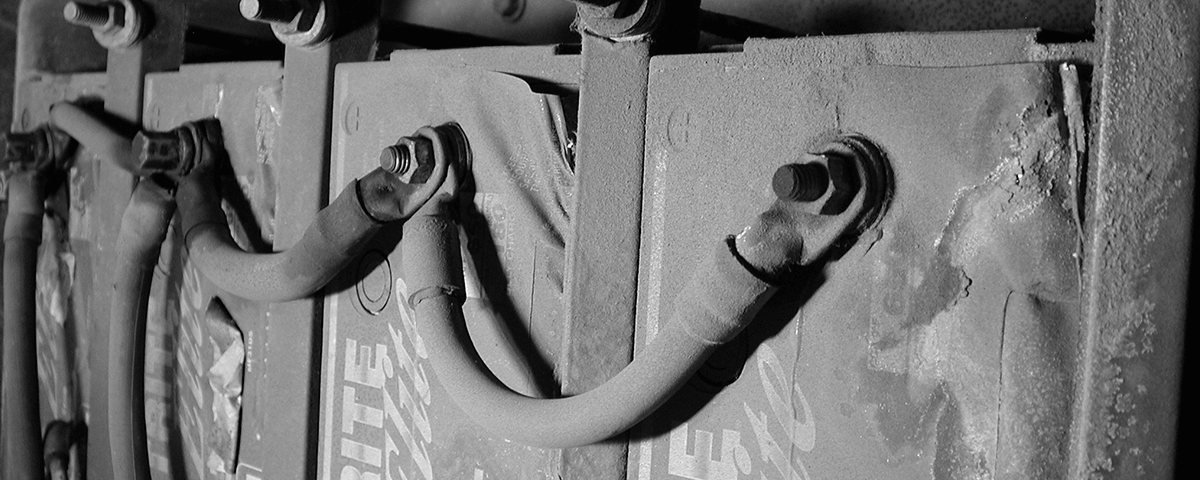
Regular visual inspections are an important part of battery maintenance.
When servicing batteries and cables, remove visible corrosion by using a wire brush. Specially designed brushes are made to facilitate this process. One brush, with a conical shape, is used to reach inside the clamp terminal.
Another, with internal bristles is used to clean the studs of the battery. Be certain to use wire brushes since using files, sandpaper or other abrasives can damage components. While it’s important to thoroughly clean the battery connections, over-cleaning can wear down the soft metal.
Battery cables are also subject to abrasion. Any time a cable comes in contact with sharp edged metal parts there’s the potential for scrapes and wear on the outer insulating layer. Once worn through or cut, the result can be grounding or at the very least an opening for corrosion to enter the cable. Once in the cable, corrosion can rapidly spread to the battery.

Thoroughly clean all battery terminals.
Cable Replacement
Whether you should replace a battery cable or not depends upon a number of factors. However, replacement should always be considered when the battery and/or starter are replaced. Even if the cable appears all right, additional inspection steps should be taken. There are three steps for inspecting the cable.
First, bend the cable at a point just beyond the terminal. If that area is stiff compared to the other parts of the cable, it probably means there is corrosion in the strands of conductor. It’s possible that the cable is corroded inside even if little corrosion is apparent at the terminal.
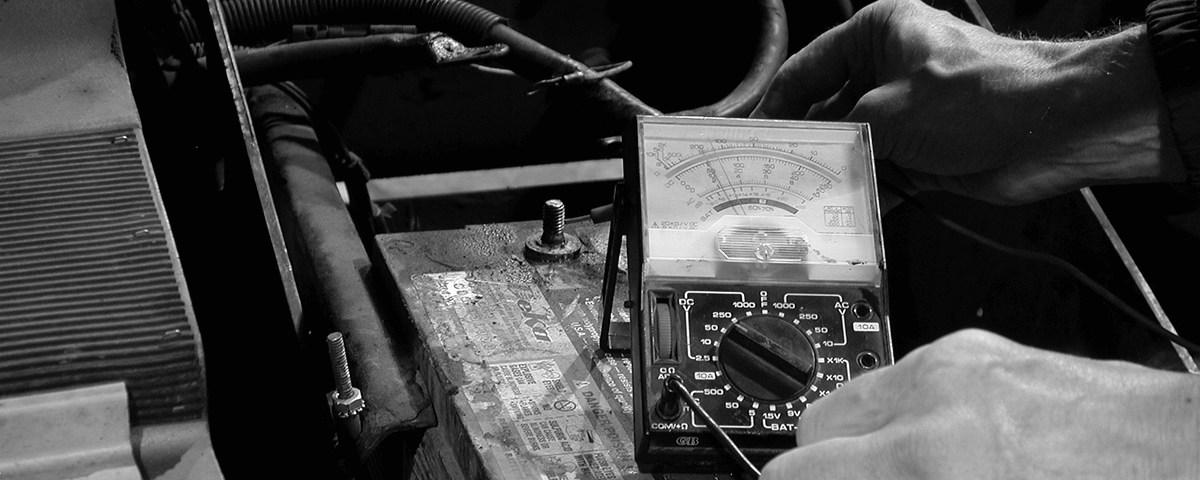
Second, using an ohm-meter, check to see how much resistance there is. It should be minimal. If there’s significant resistance in the cable, it indicates a problem.
Third, crank the starter. A good battery should provide enough current to turn the starter quickly. Slow cranking and low amperage to the starter may indicate resistance from corrosion in the cable. Also, check the type of cable being used. If it’s sub-standard in size or is manufactured from aluminum, it should be replaced.
When replacing a battery cable, always match the OEM specified part. Battery cables are designed to perform to certain standards. Using lower quality or mismatched parts can degrade performance resulting in substandard starting and increased maintenance. Replacement cables should always have resistance that’s the same as or less than the original. Usually, matching the original means choosing a cable with the same conductor length, gauge and material.
Installing a new cable is uncomplicated. Thoroughly clean the battery terminals. Also, clean the terminals on the cable. Even though the cable is brand new, some oxidation may have coated the terminal contact areas. As when doing battery and cable maintenance, take care not to over clean the battery terminals and cable terminals.
Generally, use battery terminal brushes and clean just enough to produce a fresh contact surface.
Tighten connections until they’re snug. Don’t over tighten because the battery posts and cable terminals can be damaged. Use a dielectric coating on all connections, even if there are protective caps. And remember that future corrosion is inevitable. Regular inspections will be necessary.
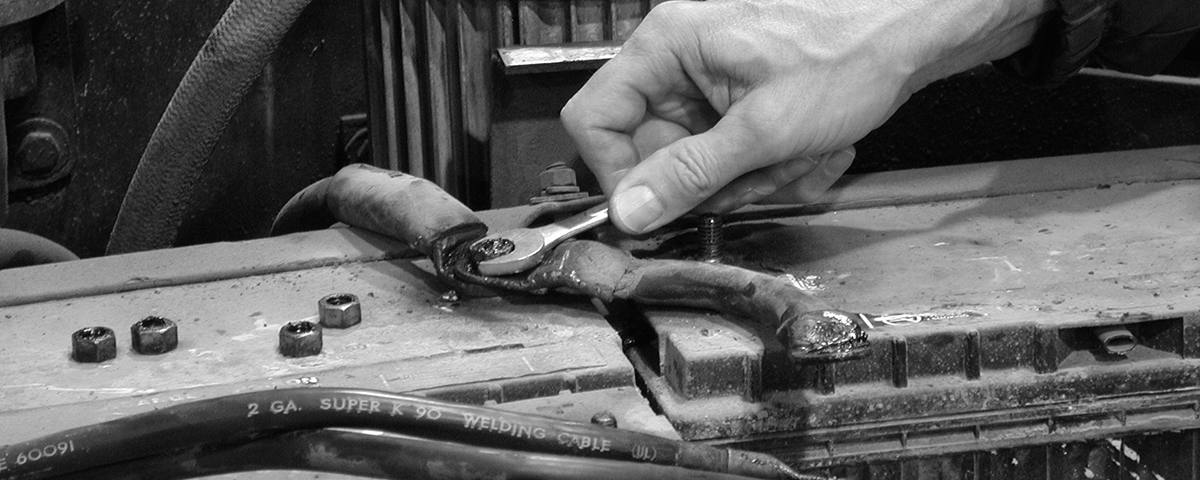
Tighten connections until they’re snug.
BATTERY PROBLEMS & SOLUTIONS
A malfunctioning battery is often the cause of a problem elsewhere in the electrical system. Too often though, the temptation is to simply replace the battery. Industry sources say that at least half of all discarded batteries still have service life remaining in them. For that reason, the battery is usually a good place to start the troubleshooting and repair process. Also, almost all other electrical system diagnosis procedures requires that the battery system be in proper working order.
Basic battery inspection
As an example of battery troubleshooting, let’s use the illustration of the starting system’s inability to turn over the engine. That condition may be caused by one of several problems:
In order to accurately determine the cause of the problem, a thorough visual inspection is a good place to begin. First, start with the battery box, the enclosure on a truck where the batteries are installed, and the battery case.
Check the box for cracks or other damage that can allow the battery to become loose and experience excessive vibration. Check the battery for cracks and bulging, which can be caused by wide variations in operating environment temperatures, overcharging and over tightening the battery hold-downs. Make certain that the hold-downs are tight enough to hold the battery in place, securely. Hold-downs can, at times, become loose enough to contact the positive terminal and the metal frame of the vehicle and cause a grounded circuit.
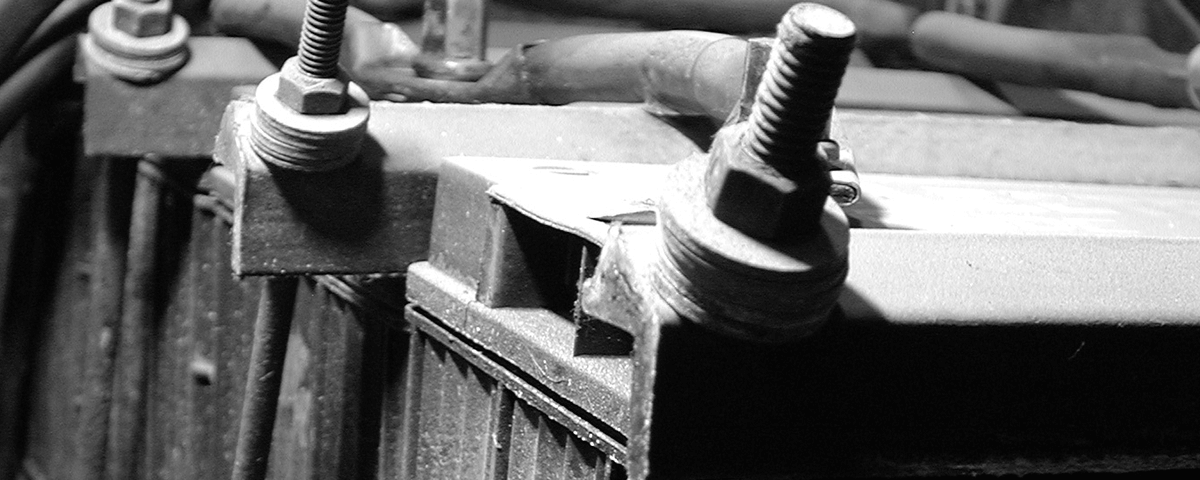
Make certain that battery hold-downs are tight enough to hold the batteries securely.
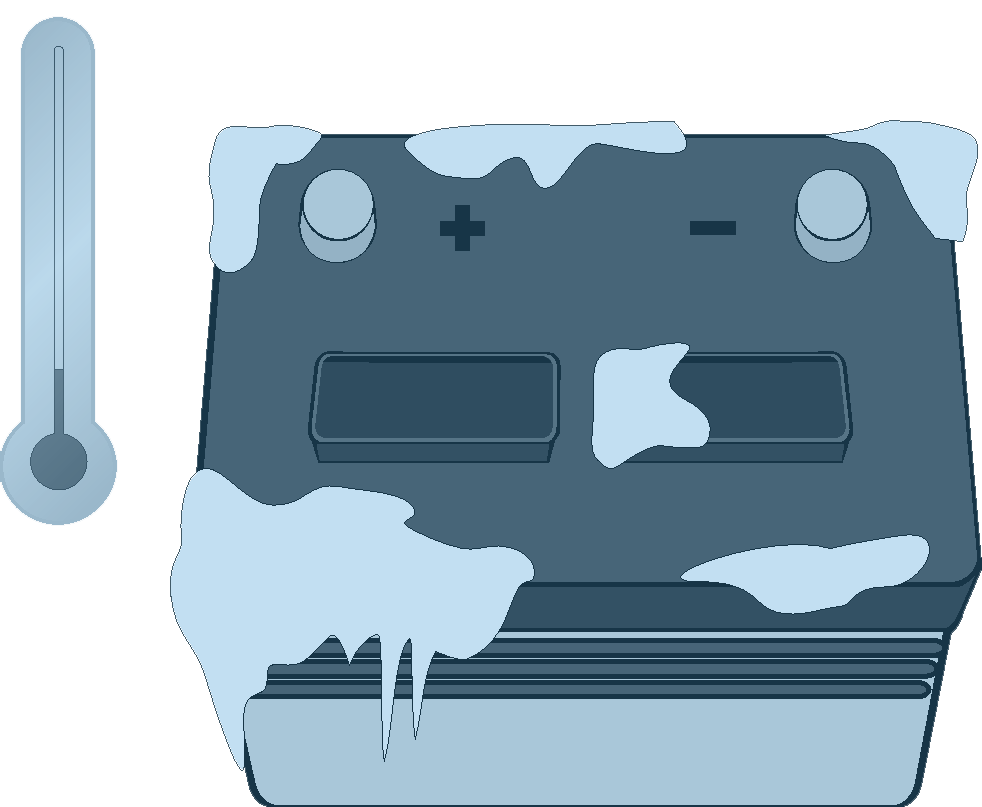
Check for signs of corrosion on the battery, cables and connectors as well as the area around the battery. Signs of corrosion can indicate that the battery is leaking electrolyte around the posts or it has been overcharged. More typically, corrosion is caused by spilled electrolyte or vapors from the battery vent holes. Corrosion and other contaminants attract and hold moisture, and can cause current drain if left untreated. Battery damage can occur if corrosion spreads beyond the connections.
A battery leakage test can help determine whether a battery leakage or corrosion buildup problem has been eliminated. Using a voltmeter, connect the negative test lead to the negative terminal of the battery. Place the positive lead in contact with the battery case and move it along the top and sides of the case. There should be no voltage indication anywhere on the case. If the meter does indicate voltage, a current path from one terminal to the other exists.
The remedy is typically to repeat the cleaning procedure.
Battery cables are another area to check when doing a visual inspection. The insulation can become abraded and worn, exposing the conductor to moisture and corrosion. It also may lead to contact with metal components causing a grounded circuit and failure of the starting system.
A simple test for checking out poor connections between the battery terminals and cables can save considerable troubleshooting time. The “terminal test” requires that the engine be turned over without starting. For this test, disconnect the fuel supply to prevent starting.
Connect the voltmeter’s negative lead to the cable clamp and the positive lead to the positive terminal. Crank the engine. If the voltage drop exceeds 0.3v, there is high resistance at the connection. Repeat the test at the negative side of the battery. Thoroughly clean the connections and repeat the test to ensure satisfactory performance.
Another basic inspection item is the electrolyte. That fluid is required to create the chemical reaction that facilitates storage of the incoming electrical charge from the alternator. It’s also required to allow the battery plates to give up their charge when called for. The electrolyte, a mixture of distilled water and sulfuric acid should be no lower than fi inch above the top of the plates at all times. If the level is below that, it should be topped off with distilled water.
An often-overlooked inspection item is the battery date code. It can frequently shed light on the problems of a battery and make the diagnosis of age related difficulties, such as weak charge, easier. Knowing the age can also make the decision to retain or replace the battery easier.
Visually inspect the battery cables for worn insulation that will expose the conductor to moisture and corrosion.
Typical battery problems
A typical hydrometer used for testing battery electrolyte.
Over and under charging both present potential for battery damage or failure. If done regularly, both will shorten battery life. In fact, over-charging is reported to cause nearly 60% of the battery failures.
Some of the signs of over-charging are low electrolyte levels, elevated temperatures and corrosion at the terminals. Low electrolyte levels carry a greater concentration of acid and cause early battery plate failure. Increased internal temperatures cause plates to distort, also causing early failure. “Gassing,” the generation of hydrogen and oxygen, which occurs as a result of the chemical reactions inside the battery, is greatly increased by overcharging. The combination of hydrogen and oxygen is explosive and should not be allowed to build up. As a precaution, do not test, repair or recharge batteries in a confined space.
The primary sign of undercharging is a dull coloration of the negative plates when scratched. Most undercharging is caused by slipping belts on the alternator, long periods of idling, poor maintenance and incorrect adjustment of the voltage regulator. The results of undercharging are excessive battery cycling, low specific gravity readings, and little or no consumption of water.
Extended periods with the battery discharged may damage it. Discharging is a chemical reaction, which continues until the electrolyte has been stripped of nearly all of its sulfuric acid. The acid migrates to the plates leaving the distilled water behind. Very often, if batteries are left for long periods of time in a discharged condition, the acid on the plates will harden and not move back to the electrolyte. The condition is known as sulfation and the battery will not hold a charge, properly. Sulfation can sometimes be remedied by doing a slow charge twice. If the battery still doesn’t hold a charge, it will have to be replaced.
In some cases, installing a low-voltage disconnect to prevent over-discharging is a good investment. Another approach is to disconnect the ground connection on vehicles that are left parked for two weeks or more. That avoids current drains from small parasitic electrical loads.
Vibration is one of the most prevalent causes of battery failure. It can cause plates to lose their coating, which can destroy the battery’s ability to take and hold a charge. Given severe vibration, the battery case can be broken or cracked leading to loss of electrolyte. To minimize the effects of vibration, be sure to secure battery hold-downs to prevent excessive movement of the battery. Always try to mount battery boxes inside the frame rails to minimize the effects of road bounce. Experts suggest also that using batteries designed for heavy-duty applications is a good idea and a good investment over the lifetime of the battery.
Insufficient electrolyte levels also contribute to battery problems. For instance, the lack of electrolyte can accelerate sulfation making it impossible for the battery to take a full charge. If the electrolyte levels are found to be low, add distilled water (never add additional acid after the battery is filled the first time). When adding water, fill each cell to the bottom of the vent well while the battery is warm. Filling it to that level when cold will result in spillage when the plates warm up and expand.
Insufficient electrolyte levels also contribute to battery problems.
Heavy electrical loads and low engine idle speeds are also hard on batteries. Electrical loads that exceed system’s charging capacity can overwhelm the ability of the battery to supply the amount of power needed for even the most basic functions such as starting the motor on a consistent basis. That’s especially true when electrical accessories have been added after the truck went into service. In those cases, a solution may be to revise the charging system and battery output. In other circumstance, it may be necessary to eliminate current consuming accessories.
An alternator belt slipping can also restrict the charging capability of the charging circuit. The slipping prevents the alternator from turning at a speed that provides the appropriate voltage to charge the battery. Unlike some of the other low battery problems, belt treatment, adjustment or replacement are relatively simple and fast remedies.
Another cause of poor battery performance is excessive voltage drop between the alternator and battery. A generally accepted voltage-drop standard is a maximum of fi volt at a 500-amp load. Troubleshooting consists of measuring the voltage drops between the charging and starting circuits. If excessive, replace the faulty cables.
Excessive heat takes a toll on batteries. To maximize service life from a battery, it should be charged and operated at temperatures below 115 degrees F. Anything above 115 and overheating occurs, which can damage the battery and shorten its normal service life. The extent of the damage and service life loss depends on how high the temperature reaches, how often the overheating occurs, and how long the batteries are subjected to high temperatures.
A typical battery charged on a correctly functioning charger will experience a 10 to 20 degree F. rise in temperature when fully charged from a completely discharged state. The temperature rise is affected by several variable factors:
Overheating, if unchecked, can result in an explosion. Temperatures of freezing or below can also be detrimental to battery health. In some cases, a cold battery will respond to a charge, but take significantly longer than one at warmer temperature levels. The approach in this situation is to allow the extra time required (typically one to two hours more in extremely cold temperatures).
Cold temperatures can slow down the chemical reaction that produces electrical current in the battery. As an example, a fully charged battery at 0ºF can deliver only 40% of its normal capacity.
A cold battery will accept a charge, but it will take significantly longer than a warm battery.
Maintaining a full charge in a battery during the winter helps to prevent a frozen battery. Nevertheless, be certain to warm up a frozen battery before charging. A weak (mostly water) electrolyte solution can cause ice crystals that can damage the plates in a battery causing an explosion hazard.
Corrosion is another common problem that afflicts batteries. It can, however, be one of the easier ones to deal with. For example, before working on a battery, clean up any spills of electrolyte thoroughly, especially around the top and connections. That will prevent contaminants from entering when caps and cap assemblies are opened during inspection and service. Be certain to leave the battery area clean and free from corrosion, electrolyte and other contaminants when finished.
Clean up spills of electrolyte thoroughly, especially around the top and connections.
Prevent corrosion buildup on cable connectors and battery posts by covering them with a dielectric coating. Wherever possible, install covers to add more protection. It’s important to keep connectors snug to batteries to prevent buildup of corrosion between a loose connector and battery post. That corrosion can then travel into the cables and eventually require new cables to be installed.
Battery testing & charging
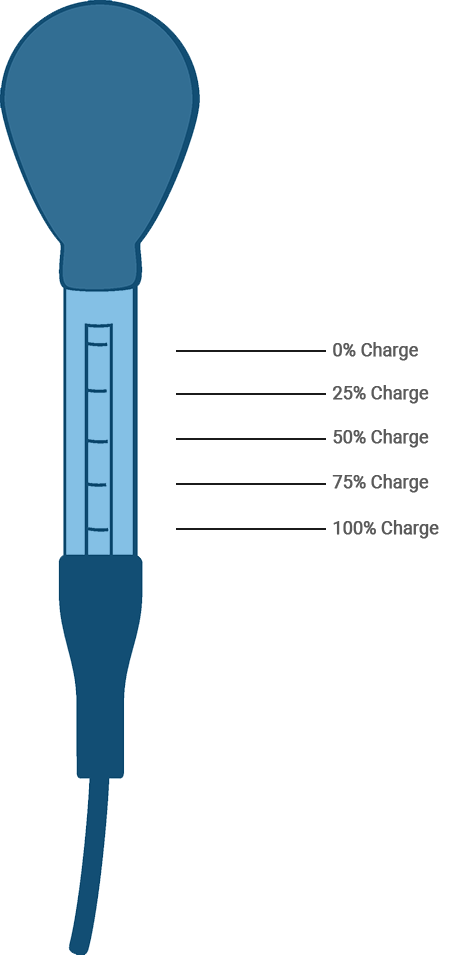
A usable battery is one that accepts and holds a charge and delivers the rated number of amps on demand. Good batteries can be recharged and returned to service. Bad batteries must be replaced. The level of charge has nothing to do with the battery’s condition. It’s simply a measure
of how much electrical energy is available now; not how many amps are available when it is fully charged. A fully charged battery should read 12.6 volts. A reading of 12.4 volts typically equals a 75% charge. Less than that, the battery is low and requires recharging.
A fully-charged battery should read 12.6 v.
Some batteries have integral charge indicators. A green dot usually indicates that the battery is at least 75% charged. A dark indicator (no dot) signifies that the battery charge is low. A clear or yellow indicator means that the electrolyte is low and must be replenished before recharging. Batteries with low electrolyte must not be recharged and represent an explosive hazard. Sealed batteries cannot be replenished and must be replaced.
Batteries with integral charge indicators often are not very accurate. They only report the status of one cell. If all of the cells are good, they should carry approximately the same charge. However, if the battery has one or more bad cells, the charge level indication may not be accurate. There are certain generally used tests for diagnosing battery problems and useful life for batteries without the built-in indicators.
For example, the State of Charge test or Hydrometer tests. This test measures the specific gravity of the electrolyte solution in the battery. To perform the test, make certain that the electrolyte level is above the tops of the plates. If it is not, bring the level up by adding distilled water and charge the battery to mix the solution. Next, test the specific gravity by reading where the float scale intersects the fluid level. (An allowance must be made for temperatures that vary from 80º F, since many hydrometers are calibrated to provide a true reading at that temperature.
However, temperature-compensating hydrometers are available, as well). Any corrected reading below 1.265 requires recharging or replacement.

Some batteries have charge indicators.
Further testing can also be done to check the potential life of the battery. Compare the specific gravity readings of individual cells. If a variation of more than about 1 exists between the highest and the lowest reading, the battery probably will not hold a charge, and should be replaced.
Another test may also be used to determine the state of charge. The Open Circuit Voltage test doesn’t require entering the battery case and exposing the electrolyte. That makes this test the choice if the battery is a sealed type or if the battery is difficult to access.
To test a battery, requires an accurate volt/ohm meter that has a direct current accuracy of ±0.5%. Compare the reading to the Open Circuit Voltage chart to find the state of charge. A reading of less than 12.66 volts indicates either the battery requires charging or there is a shorted, weak or dead cell.
The Capacity or Load Test is used to determine a battery’s ability to respond if a heavy load is placed upon it. This test is performed using a so-called “adjustable carbon pile,” which places a load on the battery to determine the voltage level it can maintain. When the load is applied, a well-functioning battery should still be able to maintain a minimum voltage of at least 9.6 volts. However, an accurate test requires that the battery be recharged if it is less than 75% charged.
| Hydrometer Readings at 80° F | |
| Hydrometer Reading | Battery's State of Charge |
| 1.265 | 100% |
| 1.225 | 75% |
| 1.190 | 50% |
| 1.155 | 25% |
| 1.120 | 0% |
When the carbon pile tester is used, the test load is set at fi the battery’s cold cranking amp rating or three times its amp/hour rating. Because a cold battery puts out less power than a warm one, this part of the testing process must be to compensate for cold temperatures. The load is applied for 15 seconds while the output level is observed. If the battery’s voltage is at or above 9.6 volts, the battery can be returned to service. If the level drops below 9.6 volts, the battery is likely to be bad. As a double check, the battery can be recharged and tested a second time or use the Three Minute Test.
That involves testing for evidence of a sulfated battery. In the test, the battery is slow charged at 40 amps for six minutes, then checking the voltage across the terminals with the charger still on. If the voltage is above 15.5 volts, the battery is not accepting a charge. Sometimes slow charging for 20 hours can reverse the sulfated condition. If not, the battery will have to be replaced.
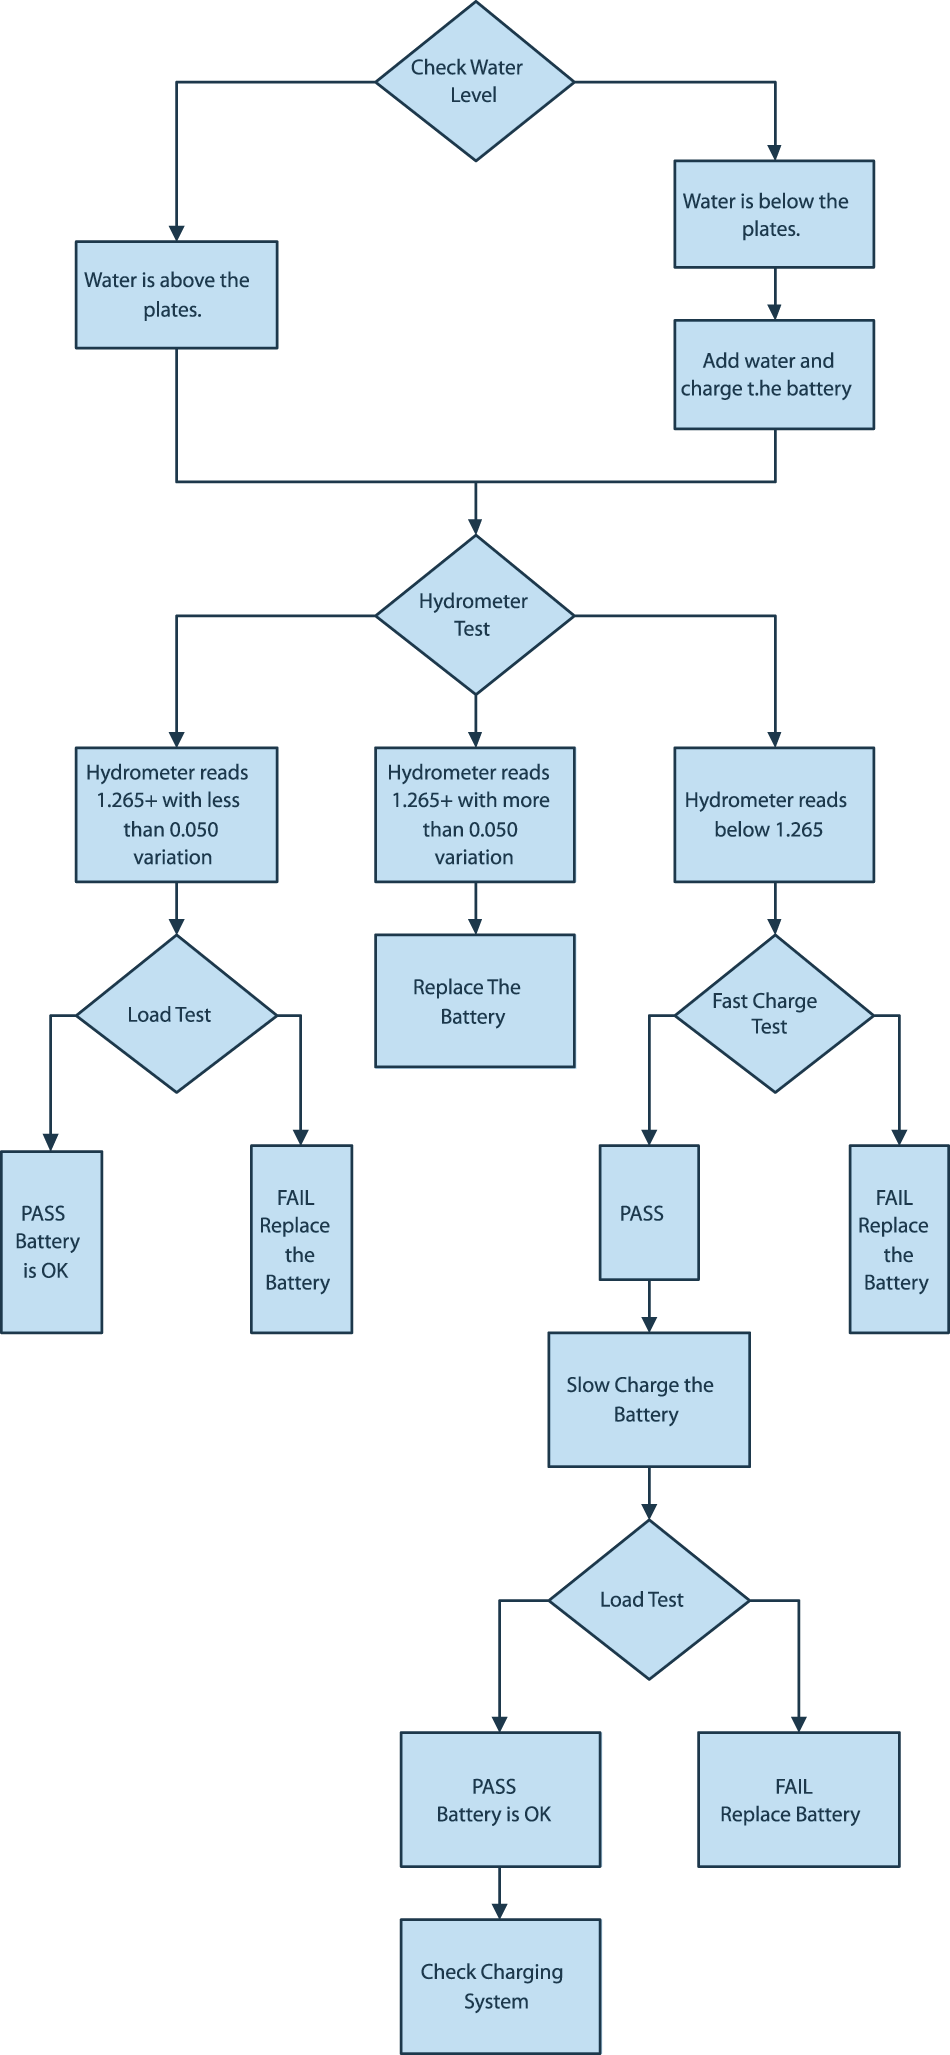
With these three tests, the decision tree shown here is a tool for help in making the decision to discard or return batteries to service.
Other ways of testing batteries are faster and very accurate. One example is the “Conductance Tester.” One advantage is that the technology allows testing without recharging the battery before testing. Conductance testers can render a verdict in seconds even with a fully discharged battery. That ability saves time, which can be used productively for recharging good batteries and replacing those that are not salvageable.
Conductance testers send a small alternating current through the battery. The conductance indicates how much of the plate area is available to hold and deliver power.
As batteries age, the conductance levels drop. Shorts and other defects in the plates also negatively affect conductance. Measuring conductance gives an accurate idea of the battery’s condition.
Some conductance testers not only analyze the battery’s charge and condition, but its Cold Cranking Amps (CCA) level. They may also be capable of analyzing the charging system and measuring the amps drawn by the starter while cranking the engine. Some even have built-in voltmeters, which allow them to check battery connections. Conductance testers may include the ability to detect bad or deteriorating ground connections.
No matter what means are used to test a battery, make certain that a good battery is fully recharged before returning it to service. Alternators are designed to maintain a battery’s charge, not to recharge a dead one. Overtaxing the charging system with a dead battery may burden it to the point that it overheats and fails.
Battery chargers are available in many varieties from small “trickle” chargers to heavy-duty, fast chargers that can actually produce enough power to crank a large truck starter. Most chargers can fast or slow charge batteries, and offer booster output for assisted cold starts. Portable units are necessary for service calls and cart-style units are a good choice for the shop environment.
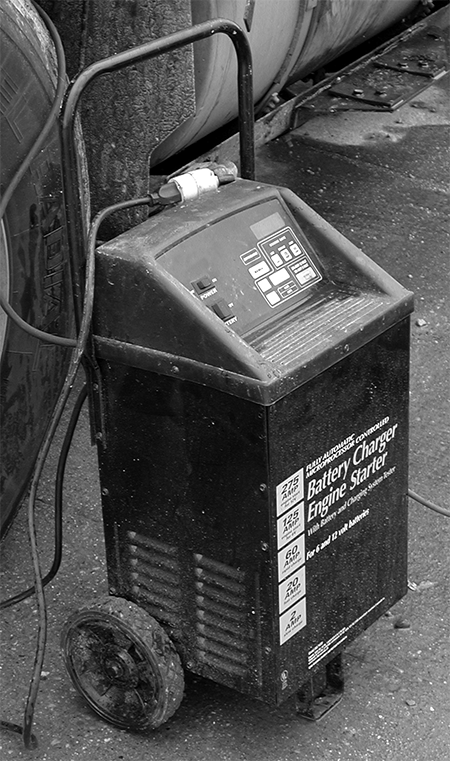
Battery chargers are available in many varieties from small “trickle” chargers to heavy duty, fast chargers.
Many traditional chargers have what is referred to as “linear” charge output that gradually tapers off as the battery’s charge level rises. The battery receives a full charge without overcharging, but the process takes more time than newer types of chargers. Later generations use microprocessor technology to control the charging process and optimize charging for the specific battery. It allows the battery to be charged at a faster rate and cuts the time to fully charge a dead battery by 50% or more.
The so-called “smart” chargers generally apply a high initial charging current and keep it at a high level until the battery ramps up. Then it brings down the level as the battery reaches full charge. Some of them even use a pulse charging feature that breaks through the sulfate buildup that resists charging by ordinary means. It allows many batteries to be returned to service, which would have been discarded, in the past.
Battery Service Safety Tips.

Battery warning label
Use the self assessment below to gauge your understanding of this section. Place your answer in the box and then check your answer by clicking on the "show answer" link.
Or, you can skip the assessment.
Instructions:
Read the question.
Place your answer in the box.
Example:
True or False:
You should read the questions and then type your answer into the box.
show answer
True!
Begin:
1. True or False: Sealed batteries prevent corrosion.
show answer
False
2. True or False: Corrosion is a prime cause of battery cable problems.
show answer
True
3. Battery cables and accessories too light for the task may result in:
show answer
a) Higher resistance in the system
4. True or False: Sand paper is a good substitute for battery terminal brush.
show answer
False
5. True or False: Battery cable replacement should always be considered when the battery and/or starter are replaced.
show answer
True
6. True or False: A cone shaped brush efficiently cleans battery posts.
show answer
False
7. True or False: The visible corrosion is likely to represent only a fraction of the total corrosion present.
show answer
True
8. The steps involved in inspecting a battery cable include:
show answer
d) All of the above
9. Replacement cables should:
show answer
d) None of the above
10. True or False: Generally, when cleaning terminals the more surface removed, the better.
show answer
False
11. Cable and battery connections should be:
show answer
c) Snug
12. True or False: “Key-off” refers to current draw that goes through a light switch.
show answer
False
13. Bulging or cracked batteries are least likely to be caused by:
show answer
d) Wrong electrolyte
14. Corrosion is typically caused by
show answer
d) All of the above
15. A battery leakage test requires:
show answer
a) A voltmeter
16. In a terminal test, if the voltage drops by _______ there is high resistance in the circuit:
show answer
b) 0.3 v or more
17. True or False: Electrolyte is a mixture of distilled water and sulfuric acid.
show answer
True
18. True or False: The date code shows when the battery was last checked for electrolyte levels.
show answer
False
19. Overcharging is reported to cause ________ of battery failures:
show answer
a) 60%
20. True or False: Undercharged batteries use very small amounts of water.
show answer
True
21. True or False: To keep an unused battery from discharging, never disconnect the ground cable or strap.
show answer
False
22. True or False: Sulfation results when the battery plates become saturated with water.
show answer
False
23. After the initial filling, if the battery needs refilling:
show answer
b) Add distilled water
24. True or False: Generally, a drop of fi volt at a 500-amp load is considered acceptable.
show answer
True
25. To maximize service life a battery should be charged and operated at temperatures below:
show answer
b) 115 degrees F
26. At 0° F a fully charged battery can deliver only ______ of its normal capacity:
show answer
c) 40%
27. True or False: Frozen batteries should be charged to warm them up.
show answer
False
28. A fully charged battery should read:
show answer
a) 12.6 volts
29. On a battery with a built-in charge indicator a green indicator reports that the battery is at least:
show answer
d) At least 75% charged
30. A State of Charge test requires:
show answer
c) Hydrometer
31. True or False: A variation in specific gravity reading of more than 0.050 from cell to cell means that the battery needs replacement.
show answer
True
32. True or False: When using a carbon pile tester to do a load test, the tester should be set at one half of the battery’s cold cranking amp rating.
show answer
True
33. Conductance testers send a ______ through the battery.
show answer
a) Small AC current
34. True or False: Conductance testers may include the ability to detect bad or deteriorating ground 33. a connectors.
show answer
True
35. Microprocessor controlled chargers can cut the time to recharge a dead battery by:
show answer
c) 50% or more
36. True or False: Always remove the positive connector first.
show answer
False